
Easy Garlic Bread is one of those simple recipes that never goes out of style. With crispy edges, a soft center and the perfect balance of butter, garlic and fresh parsley, this recipe is the kind of side dish everyone grabs first at the table. It's quick to make, only takes a handful of ingredients and always delivers big flavor.

Growing up, my mom would make this quick garlic bread using her mom's recipe and I loved how it was soft on the inside and perfectly crisp on the outside. My version is a little different, but it still gives me that same nostalgic, cozy feeling, especially when paired with a bowl of homemade pasta or used to sop up extra sauce.
When the weather starts to cool down in the fall, I love making a big batch of pasta, my favorite marinara sauce and this perfect garlic bread to welcome the comfort food season. But truthfully, this is the kind of recipe that tastes just as good any time of year. Garlic, butter and bread never let you down.
If you are looking for more side dish recipe ideas, try one of these: Burrata Risotto, Roasted Portobello Mushrooms or Gouda Mac and Cheese.
Jump to:
Why We Love This Recipe
- Beautiful Presentation: Serve the slices on a long cutting board or platter and the golden edges with flecks of parsley make this garlic bread look as good as it tastes.
- Quick: With just a few simple ingredients and less than 20 minutes in the oven, this recipe is simple enough to whip up any night of the week.
- Versatile: Pair this great recipe with pasta, dunk it into soup or serve it as an appetizer. Garlic bread fits in anywhere on the table.
Ingredients
Here are the ingredients you will need for this easy garlic bread recipe:

- Bread: A fresh loaf of good Italian bread is best. Look for one with a sturdy crust and soft interior. Ciabatta or French bread work well too.
- Butter: I prefer to use unsalted butter for this.
- Olive oil
- Garlic: Freshly minced garlic is key for the best flavor.
- Parsley: Fresh parsley adds color and freshness. You can swap in dried parsley in a pinch, but use less.
- Salt & black pepper
- Red pepper flakes
See recipe card below for quantities.
Instructions
Let's make this easy homemade garlic bread recipe together!

- Step 1: Preheat the oven to 350°F and line a baking sheet with parchment paper. Slice the bread into your desired thickness and place the slices on the sheet.

- Step 2: In a small saucepan over low heat, melt the butter with the olive oil. Add the garlic and cook for 2-3 minutes, until fragrant but not browned. Stir in the parsley, salt, black pepper, and red pepper flakes.

- Step 3: Brush the garlic butter mixture evenly over each slice of bread.

- Step 4: Bake for 10-15 minutes, until the bread is warmed through and the edges are crisp. Serve immediately.
Substitutions and Variations
Here are some common recipe substitutions and variations for this delicious garlic bread.
- Parsley: Substitute with basil, oregano or dried Italian seasoning if fresh parsley isn't available.
- Additions: Sprinkle Parmesan cheese, mozzarella or a blend of cheeses on top before baking. Mix fresh herbs like rosemary or thyme into the butter. Add extra red pepper flakes or a pinch of cayenne for more heat.
Top Tips
Here are some expert tips to make this easy recipe:
- Don't Burn the Garlic: Keep the heat low when cooking the garlic. If it browns, it can taste bitter.
- Use a Pastry Brush: Brushing the butter mixture ensures every slice gets an even coat.
- Serve Immediately: Garlic bread tastes best fresh from the oven, while it's warm and crisp.

FAQ
Yes, you can prep the garlic butter mixture a few hours in advance and slice the bread ahead of time. When you're ready to serve, simply brush the butter on the bread and bake. This way, you'll have fresh, warm garlic bread right out of the oven.
Fresh garlic gives the best flavor and aroma, but garlic powder works in a pinch. If you use garlic powder, stir it directly into the melted butter mixture instead of cooking it. The flavor will be milder but still delicious.
The key is to bake the bread until the edges are crisp and avoid adding too much butter mixture at once. For crispier garlic bread, broil the bread briefly at the end of baking. Serve it right away for the best texture.
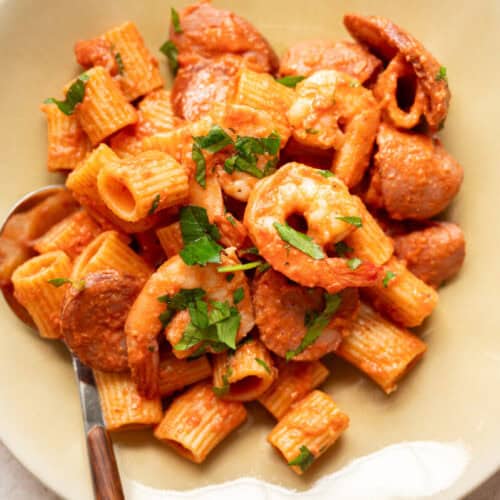
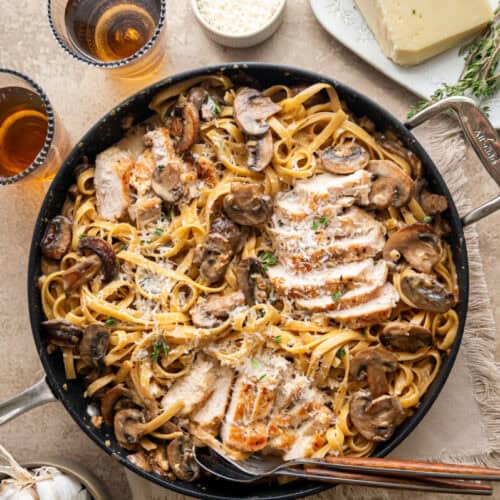
Pairing
These are my favorite dishes to serve with this recipe:


Easy Garlic Bread
Ingredients
- 1 loaf good Italian bread
- ¼ cup unsalted butter
- 2 tablespoons olive oil
- 4 cloves garlic finely minced
- 2 tablespoons fresh parsley chopped
- ½ teaspoon salt
- ¼ teaspoon black pepper
- Pinch of red pepper flakes
Instructions
- Prep the bread: Preheat oven to 350°F. Slice the Italian bread into your desired thickness and place slices on a lined baking sheet.
- Make the garlic butter: In a small saucepan over low heat, melt the butter with the olive oil. Add garlic and cook for 2-3 minutes, until fragrant but not browned. Stir in salt, black pepper, parsley, and red pepper flakes.
- Season the bread: Brush the garlic butter mixture evenly over each slice of bread.
- Bake: Bake for 10-15 minutes, until the bread is warmed through and edges are crisp.
- Serve: Enjoy warm with your favorite pasta, soup, or salad.
Notes
Kitchen Equipment
Here is some kitchen equipment you will need for this buttery garlic bread. You can find all of these products on Amazon.- Baking Sheet: Use a sturdy, good-quality baking sheet to hold the bread slices and help them bake evenly with crisp, golden edges.
- Small saucepan: Perfect for melting the butter with olive oil and gently cooking the garlic without burning it.
- Pastry brush: A pastry brush helps spread the garlic butter evenly over each slice of bread for consistent flavor in every bite.
Recipe Storage and Reheating
Here are storage and reheating instructions for the best garlic bread recipe:- Refrigerator Storage: Store leftover garlic bread in an airtight container in the fridge for up to 3 days.
- Freezer Storage: Wrap cooled garlic bread tightly in foil, place in a freezer bag, and freeze for up to 3 months.
- Reheating Instructions: Reheat in the oven at 350°F until warmed through, or wrap in aluminum foil to keep it soft while reheating.
Did You Make This Recipe?
Leave a comment below or tag us @tasting.with.tina on Instagram!


Leave a Reply